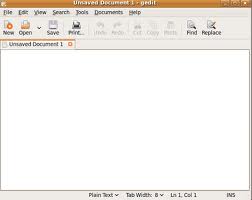
How to use gedit in Ubuntu to work with files
Recommended Ubuntu book
We previously showed you the navigation using Terminal window and using commands for files and directories in Ubuntu. Now we will show you how to edit and save the files using Ubuntu GUI editor – gedit. Many people use it as a basic notepad/wordpress type editor to save the notes and such without realizing that it actually has some cool built in features.
These features include:
– syntax highlight for programming languages which include HTML, Python, Perl and many others, including non-web languages.
– fonts and colors
– spell check
– editing files from remote locations
– line numbers and character and word count
– full support for international text
– a few other useful features.
It also uses a nice plugin system which allows you to add plugins for additional functionality with a few available here. You can install the plugins as a package, type in terminal:
sudo apt-get install gedit-plugins
Now play around and see the new add-ons, such as very useful terminal window showing at the bottom panel of the editor.
How to install gedit if you need to:
gedit is usually installed by default in Ubuntu. However, if it is missing, you can install it from a terminal window using apt-get command (more on it at some point later):
sudo apt-get install gedit
Or install it using GUI Synaptic located in System > Administration > Synaptic Package Manager.
How to start gedit:
gedit can be started from GUI or Terminal. Here is how to start it from the terminal window. Open a new terminal window and type:
gedit
Pretty easy. 🙂 You can also open it from Desktop by clicking your mouse a few times. It is located at:
Applications > Accessories > Text Editor
How to open and edit the files in Terminal using gedit:
You can do it using GUI, which doesn’t need explanations – just click your mouth, but you can also use the Terminal to get some additional options. To open a file myfirstfile for example, make sure you know the path as we discussed in our Ubuntu navigation tutorial and type:
gedit myfirstfile
if the file is in the current folder. So if you are in ~/Desktop and the file is in ~/Desktop (remember “~” tilde sign is a shortcut for your home directory), it will open myfirstfile. If the file exists, it will open it to edit, if it doesn’t it will create a new file and open it to edit.
Now here is a cool feature – you can open the file and take you directly to the line number you need. So to get to line 200 when opening the file type:
gedit +200 myfirstfile
You can also open many files at once. This feature can save you some time. Just type:
gedit myfirstfile mysecondfile mythirdfile
to open all 3 files.
Also, remember that gedit will not open the system or protected files without sudo and as you may know, sudo for GUI applications is gksudo. So to open init.d for instance you would have to type:
gksudo gedit init.d
You can also add some options such as
gedit –new-window or
gedit –new-document
Which either creates a new window in the existing opened gedit window or creates a new document in the opened gedit.
How to edit the preferences:
Once you open gedit go to Edit > Preferences > Editor. Here you can specify the options you like. For instance, you can enable autosave or disable spell check by clicking the checkbox on and off.
How to enable gedit plugins:
You can get additional plugins as we mentioned at the beginning of the post. Now to enable/disable them, go to Edit > Preferences > Plugins. You can see that a few come preloaded with standard gedit, such as spell check for instance. Go through the list and check it out, you may need it helpful, especially if you write any kind of code in gedit.
This is it for now, I will publish a few more smaller how-to tutorials for gedit, such as how to “Open file with gedit” when you right click the file for instance, which is pretty handy.


April 10th, 2011 19:10
[…] How To Use Ubuntu, Starting From Lucid Lynx « How to use gedit in Ubuntu to work with files […]
April 16th, 2012 16:39
thanks helped me alot.new to linux