Archive for the 'Ubuntu How To' Category

How to use gedit in Ubuntu to work with files

gedit Ubuntu

gedit in Ubuntu

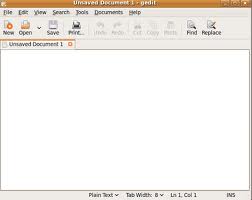
We previously showed you the navigation using Terminal window and using commands for files and directories in Ubuntu. Now we will show you how to edit and save the files using Ubuntu GUI editor – gedit. Many people use it as a basic notepad/wordpress type editor to save the notes and such without realizing that it actually has some cool built in features.

These features include:

– syntax highlight for programming languages which include HTML, Python, Perl and many others, including non-web languages.

– fonts and colors

– spell check

– editing files from remote locations

– line numbers and character and word count

– full support for international text

– a few other useful features.

It also uses a nice plugin system which allows you to add plugins for additional functionality with a few available here. You can install the plugins as a package, type in terminal:

sudo apt-get install gedit-plugins

Now play around and see the new add-ons, such as very useful terminal window showing at the bottom panel of the editor.


How to install gedit if you need to:

gedit is usually installed by default in Ubuntu. However, if it is missing, you can install it from a terminal window using apt-get command (more on it at some point later):

sudo apt-get install gedit

Or install it using GUI Synaptic located in System > Administration > Synaptic Package Manager.


How to start gedit:

gedit can be started from GUI or Terminal. Here is how to start it from the terminal window. Open a new terminal window and type:

gedit

Pretty easy. 🙂 You can also open it from Desktop by clicking your mouse a few times. It is located at:

Applications > Accessories > Text Editor


How to open and edit the files in Terminal using gedit:

You can do it using GUI, which doesn’t need explanations – just click your mouth, but you can also use the Terminal to get some additional options. To open a file myfirstfile for example, make sure you know the path as we discussed in our Ubuntu navigation tutorial and type:

gedit myfirstfile

if the file is in the current folder. So if you are in ~/Desktop and the file is in ~/Desktop (remember “~” tilde sign is a shortcut for your home directory), it will open myfirstfile. If the file exists, it will open it to edit, if it doesn’t it will create a new file and open it to edit.

Now here is a cool feature – you can open the file and take you directly to the line number you need. So to get to line 200 when opening the file type:

gedit +200 myfirstfile

You can also open many files at once. This feature can save you some time. Just type:

gedit myfirstfile mysecondfile mythirdfile

to open all 3 files.

Also, remember that gedit will not open the system or protected files without sudo and as you may know, sudo for GUI applications is gksudo. So to open init.d for instance you would have to type:

gksudo gedit init.d

You can also add some options such as

gedit –new-window or

gedit –new-document

Which either creates a new window in the existing opened gedit window or creates a new document in the opened gedit.


How to edit the preferences:

Once you open gedit go to Edit > Preferences > Editor. Here you can specify the options you like. For instance, you can enable autosave or disable spell check by clicking the checkbox on and off.


How to enable gedit plugins:

You can get additional plugins as we mentioned at the beginning of the post. Now to enable/disable them, go to Edit > Preferences > Plugins. You can see that a few come preloaded with standard gedit, such as spell check for instance. Go through the list and check it out, you may need it helpful, especially if you write any kind of code in gedit.


This is it for now, I will publish a few more smaller how-to tutorials for gedit, such as how to “Open file with gedit” when you right click the file for instance, which is pretty handy.
How to use file and directory commands in Ubuntu and Linux

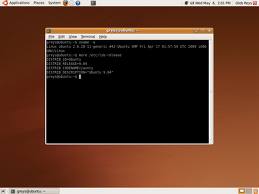
Ubuntu Terminal Window

Ubuntu Terminal Window

Now that you installed Ubuntu, learned how to navigate in Ubuntu using Terminal window, lets take a look on how to manipulate the files and directories in CLI.

1) Creating a file in Ubuntu using Terminal.

There are a few ways. The most standard way to create a file across the linux systems is touch command. So, if you are in your home folder (cd ~), type:

touch myfirstfile

and press Enter. It should have created a file called “myfirstfile in the folder. To check, just type ls and press enter, it should list the files in the folder with myfirstfile in it. Please note, you must have sufficient permissions to create the file. If your user does not have the permissions, try sudo touch myfirstfile instead.

The second way to create a file is the Ubuntu GUI way:

gedit myfirstfile or sudo gedit myfirstfile

This should open up a default Ubuntu GUI text editor window – gedit, which is a pretty cool editor and I will probably have another post on how to use it appropriately. You will probably like this way to edit the files the most if you are just starting with Ubuntu.

There are other ways:

vi and vim are the common Linux CLI text editors. If you have these installed, you can try:

vim myfirstfile or vi myfirstfile appropriately, also, may have to do sudo vim myfirstfile or sudo vi myfirstfile if needed. I personally like vi since I have been using it before I started with Ubuntu, but it is a bit complicated to start with. I may need to write another post on how to use it and list the shortcuts.

Anyways, for all we will do from now, touch or gedit will do just fine.

2) Create new directories – mkdir command (short for make directory).

Lets try creating new directory. Make sure you are in your user directory – (cd ~ or just cd) and type:

mkdir myfirstdirectory

Please note, depending on your user, you may have to type sudo before every command, so if some of the actions do not work, try sudo mrdir myfirstdirectory which will execute the command you need as a superuser.

Now type ls or ls -l and you should see the newly created directory.

3) copy the files and directories – cp command(short for copy).

cp for copy, here is how to copy a file… Make sure you are in your home directory and have created a file myfirstfile as described in step 1 of this post. Now type:

cp myfirstfile myfirstfilecopy

this would copy myfirstfile and make a copy in the same directory, calling it myfirstfilecopy.

Now make sure you have a directory created in step 2 and located in the home folder. Lets copy a file to the directory:

cp myfirstfile myfirstdirectory/myfirstfile

This would copy the file into the directory and keep the name. Obviously, there are a few ways to accomplish it, such as:

cp myfirstfile ~/myfirstdirectory/myfirstfile

cp myfirstfile /user/userfoldername/myfirstdirectory/myfirstfile where userfoldername is the name of your user.

We described a few ways of calling the same directory in a previous post – how to navigate in Ubuntu.

Now it is a bit different to copy the directory. You need to add an option -R to copy recursively, meaning including all the files in it. So create a new directory called myseconddirectory. Lets copy myfirstdirectory into myseconddirectory. Type:

cp -R ~/myfirstdirectory ~/myseconddirectory

It is close to copying regular files, just don’t forget the -R flag.

3) Move and rename files and directories – mv command (short for move). Moving the files and directories is very close to copy command. To move files try:

mv myfirstfile myfirstfilemoved

This will move “myfirstfile” file into the same folder and as you can see, it can be used for renaming the files as well. The file is now called “myfirstfilemoved”.

For the directories it is close, just use the -R flag for recursive.

mv -R myfirstdirectory myseconddirectory/myfirstdirectory

It will move “myfirstdirectory” into the “myseconddirectory” directory. So once you cd myseconddirectory, you will see your “myfirstdfirectory” inside after typing ls. 🙂

4) Delete files and directories using rm command. rm stands for remove.

To remove file just type:

rm myfirstfile

To remove the directory, once again, use -R recursive option:

rm myseconddirectory

Seems easy? Practice a bit, but be careful. This is Linux, no confirmations, as soon as you do something, it is done. Make your own files to practice with, don’t touch the ones that are already there. Eventually you will learn what the files and directories in Linux are kind of the same throughout different distributions. It is kind of like Windows – remember when you first started to find out that my computer is the place you need to go to… 🙂

Please leave us the comments if you find this post useful or have any questions or suggestions. We will be slowly moving along and making out how to posts more complicated, referencing the older posts as we go. So if you find any problems with this post, let us know as well.

How to navigate using Terminal Window in Ubuntu and Linux

new terminal in Ubuntu

new terminal window in Ubuntu

Navigation is one of the first things you need to learn in Ubuntu if you want to start going beyond clicking and go beyond user interface. I will try to explain the most important uses and options of these basic commands in simple language here, please let me know in the comments if you need any clarification or just want to leave some feedback. CLI or Command Line Interface is the most important part of the Linux. First, open a terminal window and we will start learning how to navigate from one directory (folder) to another, do various actions on file and directory structure.

Now, these commands are pretty much standard across most Linux, even Unix distributions.

1) pwd command. Once you are in the Terminal, type pwd and press Enter key- it will show you where you are right now. pwd stands for “print working directory”. So, if I am in a home directory of the user hack, it will show /home/hack

So, any time you want to know where you are located, type pwd and press Enter. Now keep in mind that it may show you location as “~” in it. “~” symbol stands for home directory, so if you are user hack, it will show you “~” as the directory instead of /home/hack as it is your home directory. pwd command has two options, but they are irrelevant for you right now. Never the less, you can experiment. For reference, they are -L and -P. So, if you type pwd -L it will show the logical path, such as symbolic link. If you type in pwd -P, it will show the physical path and will not show the symbolic link if there is one. You can also do pwd –logical or pwd –physical which are the same commands but with more typing.  As with some other commands, it also has pwd –help and pwd –version. Type those in and see what they do. –help may give you even more information.

2) cd command. Just like in Windows command prompt window, cd changes the directories. Usually new terminal window takes you directly to your home directory. Use cd command to go somewhere else. Here are some examples that you can try:

cd Desk (now hit “tab” key to see autocomplete in action. It should auto-complete your directory for you and show “cd Desktop“). If not, perhaps you are not in your home directory now. Then try cd ~/Desktop . Press Enter key for the command to execute. Remember, “~” takes you to the home directory. To get back to your home directory simply type cd or cd ~ .

To navigate to root directory, type in cd / . This is the main directory. When you type “cd /“, you can try hitting tab twice. It will show you all of the folders located in the root directory. Start typing cd /va and press tab – it will autocomplete the folder for you and show cd /var . This may be not the best part for me to show how auto-completion works, but if you learn it early it will save you a lot of time down the road. 🙂

So browse around, look at the file structure, if you get lost just go back to home (cd ~) or root directory (cd /) and start all over.

You can also use relative paths. For instance, go to your Desktop directory (cd ~/Desktop). If you want to go back to your home directory, or just one directory down to /home/hack, you can just type in “cd ..” with no quotes. two dots represent one directory down. One dot represents current directory. So, typing cd . will just keep you where you are. What would you need to do to get to /home? either cd /home or cd ../.. from /home/hack/Desktop. you can go as many directories back as you need to. cd ../../.. would take you to the root folder in this case.

Now just remember cd command – c for change, d for directory. So to Change Directory use cd.

3) ls command. ls stands for list. It is the same command as “dir” in Windows Command Prompt window. It lists the content of the current folder. To see all of files and directories of the folder you are in simply type ls and press Enter. You don’t need to navigate to other folders in order to see the files. Just type ls /var to see the contents of the folder /var. ls /.. to see the files and directories in one folder down. It does come with a lot of options. I will list some here for reference, but the one you may use the most in the future is ls -l

ls -l stands for long list, it shows more information than the regular ls command. It shows things like the file/directory owner and permissions.

ls -r lists the files and folders in reverse order.

There are many options that you probably will not use right now or at all. To see the full list type in man ls . man command stands for manual. Whenever you need any information on the command and how to use it, just refer to the documentation. Say you need more information on how to use cd command. Just type in man cd and it will show you the information.

One last thing I will not for this command is something that I use a lot and usually it doesn’t get listed in many manuals. You can list just the files of a certain filetypes such as ls *.php with show all .php files in the folder. You can also mask for names and other things, such as ls a* will show you all the files and folders starting with letter a.


This is it for navigation. Now practice, look around the folders, not too much fun but at least you know how to do so now. I will try to cover the file and directory management commands some time soon. Such as creating and deleting, copying and moving, etc.

Turn off system beep in Ubuntu

System Beep

System Beep

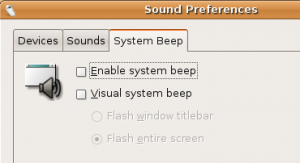
System beeps are annoying. Not only the sound is bad but it doesn’t even come from the speaker, instead it comes from the midi on your computer board. It can get very annoying every time it goes off in a quiet place like library. Even at home, when you are just trying to concentrate. Anyway, it is easy to turn it off.


The easiest solution is probably:

Go to System > Preferences > Sound > System Beep tab. Just uncheck the box and the beep is a history.


You can enable the visual beep if you want. I wish Ubuntu would make it more configurable so I can just pick my own sound or at least make the default one less loud and annoying. After all these system beeps do come up quite often and depending on your computer it can easily wake your neighbors up.

Some cases when system beep comes up include:

1) Typing the wrong login and trying to get into the system, which happens quite a bit when I get on pc at night in a dark.

2) No auto-complete option when you type something in the Terminal window. Happens quite a bit, especially navigating through the directory structure.

3) Searching for something in Firefox when there are no results. Comes up a lot when I try look up a position of the website in google for instance.

etc. When does it frustrate you the most? 🙂

I searched online a little bit about this issue and seems that there are many many users complaining about it… I hope that this is something that will be fixed in the future updates. After all, I’d like to have the beep, just want the sound to be more pleasant and from the regular speakers. Also, seems that people didn’t have an easy option to disable it in the older versions or prefer to use different methods. If you have an older version or just like experimenting, you can try these solutions as well:

1) Temporary disabling via user preference utility in terminal, type:

xset b off

xset b 0 0 0

2) For the terminal – Edit > Current Profile > General > Uncheck “Terminal Bell”

3) Set bell frequency to 0 in terminal type:

setterm -bfreq 0

4) Blacklist the pc speaker driver. In terminal type:

sudo sh -c “echo blacklist pcspkr >> /etc/modprobe.d/blacklist”

or just go to /etc/modprobe.d/blacklist and manually add a line at the end: “blacklist pcspkr”

Please note, that some Ubuntu versions have /etc/modprobe.d/blacklist.conf

5) Remove the driver. In terminal type:

sudo modprobe -r pcspkr

to re-enable the driver you’ll have to type:

sudo modprobe pcspkr

6) Removing the module, which is pretty much the same, in terminal type:

sudo rmmod pcspkr

If you want it back, just type the same command:

sudo modprobe pcspkr

I hope this helped you and you can now enjoy your peaceful and quiet evenings.

Please let us know if it helped you and if you have tried any other solutions.

How to open a Terminal window in Ubuntu

Ubuntu Terminal Window

Ubuntu Terminal Window

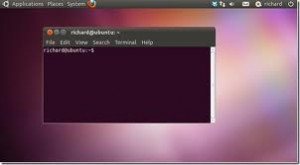
This one is simple, but many starting Linux users find terminal windows extremely overwhelming. It is true, even in Ubuntu you WILL have to use terminal at some point. It is similar to Windows Command Prompt window but is more vital part in the OS. 🙂

It is usually a lot faster to get something done using Command Line Interface (CLI), but you need some experience before you get better at it. So, here is how you start a Terminal window in Ubuntu:

Applications menu > Accessories > Terminal.

Now lets configure a terminal shortcut keys. Go to:

System > Preferences > Keyboard Shortcuts.

It is also pretty convenient to open/switch between terminal windows by pressing Ctrl + Alt + F1 through F6. F7 will hide the Terminal windows and get you back to the desktop.

These are the simple ways to open the terminal window in Ubuntu and do simple navigation between the ones you have. We will have a look at common functions and describe some useful terminal commands in the future posts.

Edit: I broke my ubuntu today and almost lost hope as ALT+F# buttons did not work. I was able to get the terminal window using this shortcut:

Ctrl+Alt+T

How to run Windows In Ubuntu – Installing VirtualBox

XP Virtual Box In Ubuntu

Windows XP Virtual Box In Ubuntu

VirtualBox gives you the ability to run another operating system inside of your already existing operating system.  First, you can download a copy here, but it is not needed as you can install it using synaptic package manager. VitualBox is very convenient. As stated before – it does run an OS inside of another OS, so make sure you got a bit of RAM for two systems. However, unlike with dual-boot system, you would not have to reboot the computer every time you need to use a different OS. You can also enjoy the convenience of easily running the applications that you can’t live without and completely give up one system over another. VirtualBox is just an easier way to have it, however, if you like to run Windows applications in Ubuntu, check out Wine project (a bit more complicated, more on it later).

Anyways, have a Windows CD handy and logged in to your Ubuntu, let’s start. Go to System > Administration and look for “virtualbox-ose”. Install the package. Next, use a terminal window to add yourself to vboxusers group. Type:

sudo adduser $USER vboxusers

or simply type in your username instead of $USER.

Next step is to enable USB support for your VirtualBox. Open terminal window once again and type:

sudo gedit /etc/init.d/mountdevsubfs.sh

This would open an editor to edit the file. Now find the section that says:

#
# Magic to make /proc/bus/usb work
#

Make sure that these lines are uncommented (no  ‘#’ at the beginning), if they are, uncomment them (remove the starting ‘#’ sign). These 5 lines are starting with:

mkdir
obusmode
domount usbfs
ln -s .usbfs
mount

Save the file and reboot.

Now it is time to launch the VirtualBox. Go to Applications > System Tools > Innotek VirtualBox and click “New” as we are creating the new box. Now select OS Type you are trying to install – such as Windows XP and name the box. Select the memory you want to dedicate to the box and how to share the hard drive. Make sure you have enough disk space… a few gigs will do. 🙂

Time to install Windows. Put in your CD and go through the “settings”. Make sure you have some options such as “Mount CD/DVD Drive” for it to work, but also go through additional settings to set up your network and such. Click Next and Windows will start installing.

Once the install is complete – you should have a Windows VirtualBox. I would recommend going to “Devices > Install Guest Additions” next. This option will give you a lot more flexibility, such as running in full screen mode, seamless mode, share the folders and copy cut from one system into another. Pretty cool stuff.  Now restart again and log into to your new VirtaulBox. Play around, check out Full Screen Mode by pressing Host Key, usually right ctrl unless you changed it, together with “F”. Also, check out Seamless Mode by pressing Host Key with “L”. To get out of the mode, just repeat the key combos.

You now have a system within a system. Good work. 🙂

How to install Ubuntu

Ubuntu Installation

Ubuntu Installation Screen

Installing Ubuntu is easy. First, make sure you have a copy of Ubuntu (look through my recent post – How to Burn Ubuntu Disk if you have to). Second, decide whether you want it to have on the same machine as your other OS. Yes, you can have Windows and Ubuntu on the same computer.

Now lets start. If you have a disk, you have two options:

1 (easy) – install it from your Windows. Start your computer and insert the Ubuntu disk into the drive. It should open up a screen with installation options. Now this option is good if you are just going to use Ubuntu as a secondary system. You can later even remove it via add/remove Windows options. The bad thing is that it will affect the performance as it will be using Windows file system. Now the Wubi installation will guide you through the process. It is as easy or even easier than installing Windows, just pick your settings, username, password, etc. It will then download the required files for selected configuration and you will have a dual boot computer. Just restart the Windows and you can pick which OS you want to load on every reboot.

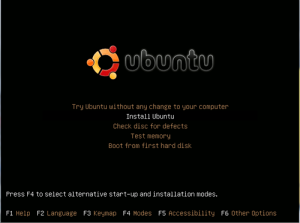
2 – Regular Installation. I prefer this method. I still use Windows, but I have a second pc and a virtual box (if you are not sure what it is, it’s like an operating system inside of an operating system… more on this later) with Windows. Anyway, its time to start. Start Windows, plug in disk and wait for the install screen to pop up. You can also install it by enabling the bios to boot from CD and start your computer with the CD in the drive. “Demo and Installation” option is the one you need.  Make sure you have enough disk space, I’d say around 5Gb at least. You should get to the screen with the desktop and actual Ubuntu, however, it is only a demo. To install, click “Install” on the desktop. It will guide you through a few simple steps, such as selecting language, picking user name and password, selecting partition and some others… Selecting partition is probably the most confusing part. If Ubuntu is the only OS you will have, you can use the entire disk. If not, just use the largest continuous space. Keep on going through the easy configuration screens and click “forward” until you see “install” button. Here you can review the settings before clicking it.  Once complete, remove the CD from the drive and restart your computer.

Ta-da! Doesn’t get much easier than that! 🙂 Now just login using the credentials entered during installation and enjoy the new system!

Please let me know if you have any questions or comments…

How To Burn Ubuntu Disc

Maverick Meerkat Disc

Maverick Meerkat Disc

After showing off Ubuntu a few people asked me where they can get Ubuntu and how much it is. Next time I will just send them to this post instead. 🙂

Ubuntu is freely available on the web in the .iso format. You can download a desktop/laptop edition here. After download is complete, you can burn it on the disk. Regular 700 mb CD would work but if you want to have it on DVD, its ok too . Here are the instructions:

If you use Windows 7, it comes with built in support to burn ISO files. Just right click the newly downloaded file and click “Burn disk image”.

For older versions of Windows you can use CD burning software that has an ability to burn image files, ISO in this case… I prefer nero which comes with free trial if you want to give it a shot. Just pick a menu option to burn an image and find the Ubuntu file that you have just downloaded.

Newer Macs also have an option to burn an image file, just use the disk utility or disk copy, depending on your OS.

If you already use Ubuntu and just trying to get the newer version, it also has a built in support to burn ISOs. Use CD/DVD Creator and burn it as a file image.

Upon completion you should have a bootable Ubuntu disk.

If you don’t want to waste a disk, you can also install Ubuntu from a flash drive. However, if you decide to make bootable disk out of ISO, make sure you burn it as an image. You cannot just drag and drop the file and burn it as data.

Disable Hibernation on Ubuntu Laptop

Ubuntu Lucid Lynx puts your laptop into hibernation by default when idle. During hibernation, the content of your RAM gets written to the hard drive on a separate partition before turning off the laptop. This content gets reloaded on the next start up. In order to hibernate, your laptop needs to have enough free space on the hard drive.

In some cases, even when the hard drive space may not be an issue, you may like to decrease the waiting time for the computer to boot up again and would rather have it go into sleep mode rather than hibernation. This is when you may want to change these settings. In order to make it go to the sleep mode when running on battery power, follow these steps:

1) Open the terminal window (ALT+F2)

2) Enter gconf-editor command

3) Once the editor window comes up, go to apps -> gnome-power-manager -> actions

4) You should see two sleep_type options – sleep_type_ac for the power and sleep_type_battery for the battery mode. Now change the value for sleep_type_battery from hibernate to suspend and you are set.

You can also edit the Power Management options under “System” -> “Administration” and specify the time you want to wait before your laptop/pc goes into sleep/hibernation mode.

Window buttons on the right

Lucid Lynx Window Buttons

Lucid Lynx comes with window buttons on the left by default, similar to the ones on Macs. As a previous Ubuntu and Windows user, I find them easier on the right hand side. Luckily, it is really easy to change and it took me less than a few minutes to find the solution.

All you have to do is:

Step 1: Go to Applications -> Accessories -> Terminal

Step 2: Type “gconf-editor” with no quotes

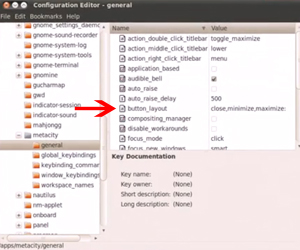
Step 3: You will see “Configuration Editor” window now. Go to apps -> metacity -> general.

Step 4: Find “Button Layout” key and change it. It is “close, minimize, maximize:” by default. To have it on the right hand side, type in “menu:minimize,maximize,close”. This will add the menu button on the left hand side, which I find useful. If you don’t need the menu, just type “:minimize,maximize,close”.

This was very simple, yet made the whole lot of difference for me.