How to find out Ubuntu system information

Recommended Ubuntu book

There are a few ways to figure out which version of Ubuntu and kernel you are using.

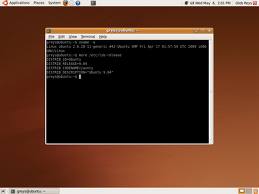
First, lets try GUI. Just go to System > About Ubuntu. It will shows you a lot of information, including the version you are using.

You can use the Terminal to find out more. Open it up and type:

uname -a

It will print all the information, -a stands for all. You can try other flags, such as -r, -o or -v.

uname -r

will show only the kernel information

uname -o

shows only your operating system, and

uname -v

displays the version of your kernel.


There are other ways to find the version of your linux. Type:

lsb_release -a

-a shows all information once again. You can alternatively use:

cat /etc/lsb-release

or try

cat /etc/issue


Don’t you just feel better now, knowing more about what exactly is under the hood of your PC case? 🙂

How to check disk space in Ubuntu

Recommended Ubuntu book

Ubuntu Disk Usage Analyzer

Ubuntu Disk Usage Analyzer

There are quite a few ways to check the hard drive disk space in Ubuntu. Lets look at the most popular ones.

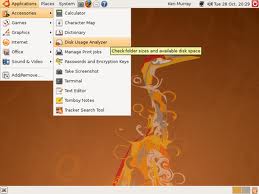
1) Using GUI in Gnome – Just go to Applications > Accessories > Disk Usage Analyzer. Open it and it will show you used and free disk space. Easy, huh? Well, here is what else you can do – click filesystem scan and it will show you the usage of each individual directory and display it in a pretty graph.

2) Using command line. Now this is where it gets fun. There quite a few ways to check the disk space using the Terminal. One of the most popular is:

df

Now df by itself as you can see is confusing. Let’s try it with a flag:

df -h

A lot better, huh? -h flag stands for human readable format.

There are a lot of other tools you can add to make the command line look prettier and more user friendly. One such tool is discus (disc usage). Type:

sudo apt-get install discus

After installation you can just type in:

discus

and it will show you the stats in very friendly format. It is configurable, so check out

man discus


We can also use du command (disc usage) to show the size of the current directories. Type in Terminal:

du

and it will show you not too friendly output, try again using some flags

du -sh *

or

du -s -m *

-s stands for summary, -m to show it in megabytes, or you can once again use -h for human readable.


Check total free space in the system – use free CLI command. Open terminal and just type:

free

or

free -m

Once again, -m flag to show it in a nice format in Mb.


Do you need it to take one step further and check the CPU load and Memory Usage?

Use top command. Type in Terminal:

top

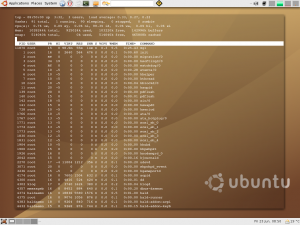
as you can see, it shows you the computer load and usage in real time. You can sort it while watching by pressing m key by memory, l by load, t by process time.


This is about it. You should now know how to check you system status, free and used space, cpu and memory usage.

It takes time to memorize these commands, but once you do it will be easy. Just remember that each command in Ubuntu is well documented and you can also do

man <command>

or try

<command> --help

to refresh the memory.

How to add a new user in Ubuntu

Recommended Ubuntu book

You create your first user during the initial Ubuntu installation. This user has special privileges, such as create new users and performing a lot of administrative tasks. There is also a root user account which is the main administrative account and has pretty much all the priveleges the user can get. Now we can get a lower level of user with just basic privileges.

Adding new user in Ubuntu is pretty easy. There are two ways – using GUI and Terminal CLI.


Lets take a look at GUI first (just in case, GUI stands for Graphical User Interface). Go to System > Administration and  pick Users and Groups menu option, it will prompt you for your main user password.

You are now in Users and Groups section. Now click “Add User”. Check out the “Advanced” options and “User Privileges”. Obviously, you would want to modify some privileges, such as “Connect to Internet”. Now press OK, get back to the previous screen that now lists the new user and press OK again. You have just created a new user and the new home folder for the user.

Try playing around in Users and Groups section. Create new groups and try placing users into different ones. This would allow users to share their files and folders, and you can set permissions on other folders in the system (will need to make another post on this) to use by certain groups.


Now lets create a user using a terminal window, open a Terminal and type:

sudo adduser newuser

or

sudo useradd -d /home/newuser -m newuser

where -d flag helps creating the home directory for the user and -m forces the directory creation. You can also specify the password right away with useradd function by using -p flag and typing password after it.

Also, you can just specify the password for the newuser as:

sudo passwd newuser

These commands are almost identical but adduser is a bit easier because it will prompt you for every piece of information after you press enter. Try it out.

How to use Terminal as a desktop background in Ubuntu

Recommended Ubuntu book

terminal in desktop background in Ubuntu

terminal in desktop background in Ubuntu

Having a quick access to Terminal window in Ubuntu helps speed up daily tasks quite a bit. As we described in the previous post, you can install Guake, which is a convenient Quake style Terminal window with a few nice features.

Here we will show how to take it one step further and embed Terminal window in desktop.

There are quite a few ways to accomplish the task, even using some third-party terminals, but we will take at the two most used ways.

1) If you use Compiz package, it is pretty easy to embed Terminal in the desktop.

First, you need to add a new terminal profile. Open a Terminal window and go to File > New Profile. Let’s call this profile desktop-embed-profile.

Second, go through the options and mark as following: Turn Off “Show Menubar By Default” option in “General” tab.  Under “Title and Command” tab put “desktop-embed-profile” as initial title and select “keep initial title” in the drop down box below for “when terminal commands set their own titles”. Under “Colors” you may have to experiment to see which options you like the best for your desktop. Just leave as is for now if you want or change whatever you feel like changing. Next tab “Background” – select “transparent background” option and move the slider as you feel needed, it controls the transparency.

Now lets configure the Compiz options. Go to Compiz Configuration Manager.

a) Activate the “regex matching”.

b) Activate “windows decoration”. In window decoration plugin now add “!title=^desktop-embed-profile$” with no quotes in “Decoration windows” field.

c) Activate “window rules”. In window rules plugin now add “title=^desktop-embed-profile$” with no quotes in a few fields: Skip taskbar, Skip pager, Below, Sticky, Non resizable windows, Non minimizable windows, Non maximizable windows, Non closable windows.

d) Activate “place windows”. In this plugin click the “Fixed window placement” setting and add new item to “windows with fixed positions”. Fill “Positioned windows” field with “title=^desktop-embed-profile$” and set the window position with sliders, measured in pixels. 0 x and 0 y are the top left corner positions. Select the checkbox for “Keep in Workarea” and close the window.

At last, lets disable the blinking cursor for this profile. Open configuration manager (gconf-editor in Terminal)  and get down to apps > gnome-terminal > profiles > Profile1 (if this is your first profile) – set the cursor_blink_mode option to off.

Now you are done with the plugin settings, press ALT+F2 to run this command:

gnome-terminal --window-with-profile=desktop-embed-profile

It will embed the terminal into your desktop. Type exit if you need to get rid of it.


2) If you don’t use Compiz, get devilspie package:

sudo apt-get install devilspie

and create a configuration file in your home directory:

mkdir ~/.devilspie

now lets create a config file:

gedit ~/.devilspie/DesktopConsole.ds

Paste the configuration, something like:

(if
        (matches (window_name) "desktop-embed-profile")
        (begin
                (set_workspace 4)
                (below)
                (undecorate)
                (skip_pager)
                (skip_tasklist)
                (wintype "utility")
                (geometry "+20+20")
                (geometry "900x600")
        )
)

but change the geometry values – first one with “+” signs is the offset while the second one is the width and hight.

Now open a new terminal window and go to File > New Profile. Name it “desktop-embed-profile” without quotes in “Title and Command”.

Go through the options and do the following:

Turn Off “Show Menubar By Default” option in “General” tab.

Under “Colors” you may have to experiment to see which options you like the best for your desktop.

Next tab “Background” – select “transparent background” option and move the slider as you feel needed, it controls the transparency.

In the “Scrolling” tab select “disabled” for the “Scrollbar is” option.

Add to start up if you want to start this every time when your machine turns on. In System > Preferences > Startup Applications add these 2:

devilspie
gnome-terminal --window-with-profile=desktop-embed-profile

Restart your pc and enjoy.


These are the 2 easy ways to enable Terminal in the Desktop background. There are more ways, but hopefully you will find one of these more helpful.

How to install Guake in Ubuntu

Recommended Ubuntu book

  [ad#1]

Guake is a cool Quake style drop-down terminal for Gnome used in Ubuntu by default. If you use Kubuntu, which uses KDE instead of Gnome, you would need Yakuake, video for Yakuake is below:


By default, you can show and hide the terminal with button F12.

To install it, just type in Terminal:

sudo apt-get install guake

Now go to System > Preferences > Startup Applications and click add, in the new window type “Guake Terminal” for name, /usr/bin/guake/ for command and “Guake Terminal” in the comment. It will now launch Guake on startup. Now go through some Guake settings in System > Preferences > Guake Preferences, change as needed and start – Applications > Accessories > Guake Terminal.

Hope you like it, it does speed some things up a bit.

How to use syntax highlighting in gedit

Recommended Ubuntu book

Here we will continue the gedit tutorials and explain syntax highlighting. If you want to see previous gedit posts – you may find How to open a file with gedit on right-click and How to use gedit helpful.

Syntax highlighting is built into gedit on Ubuntu. It shows the programming or markup code in different colors, which is a very handy feature when you try to edit html, php or other programming files.

Open gedit and go to View > Highlight Mode > Scripts. Here you can see all the languages it supports by default.

Don’t see the language you need? Add or find one. All you need is a .lang file for the needed language. There are a ton of them online, just google or bing “ActionScript lang file for gedit” or start making your own. .lang files are located in /usr/share/gtksourceview-2.0/language-specs/ folder. Just place a file there or create a new one. This is also where you go to edit the file. For example, if you don’t like the default color scheme for php, open up php.lang and stat making the changes.

Pretty easy, eh?

How to open file with gedit with right mouse click in Ubuntu

Recommended Ubuntu book

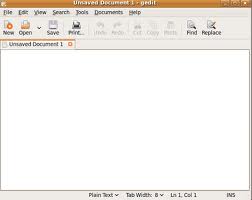
new gedit window

new gedit window

It may be pretty convenient to open a file in gedit when right-clicking any file, kind of like “open with notepad” option in Windows. You would need to make a new nautilus script, so lets type in this command in the terminal:

gedit ~/.gnome2/nautilus-scripts/Open\ with\ gedit

Basically, this script creates a new file called “Open with gedit” in the the nautilus scripts folder for your user. If it is not working, try gksudo in front of the command, but should be fine as is.

The new gedit file opens up, insert this script code:


#!/bin/bash
#
# Nautilus script -> open gedit
#
# Owner : Largey Patrick from Switzerland
#   	  patrick.largey@nazeman.org
#	  www.nazeman.org
#
# Licence : GNU GPL
#
# Copyright (C) Nazeman
#
# Encoding UTF-8
#
# Ver. 0.9-1 Date: 04.04.2003
# Add compatibilty with Nautilus 2.x
#
# Ver. 0.9-1 Date: 16.02.2002
# Add multiple file open in the same windows
#
# Ver: 0.9  Date: 27.10.2001
# Initial release
#
# Dependence : Nautilus (of course)
#	       Gnome-utils (gdialog)
#
curpath=`echo $NAUTILUS_SCRIPT_CURRENT_URI | sed 's/file\:\/\///'`
cd $curpath
filesall=""
while [ $# -gt 0 ]
	do
		files=`echo "$1" | sed 's/ /\?/g'`
		filesall="$files $filesall"
		shift
	done
gedit $filesall&


and save the file. Please note, if it will not work, get the code in plain text from here as html may not copy characters correctly.

Now make the script executable. Open terminal window and type:

chmod u+x ~/.gnome2/nautilus-scripts/Open\ with\ gedit

Done. Now lets take a look at your new nautilus script. Right click any file on your desktop and go over “Scripts” menu options. You should now see “Open with gedit”. Click it and you should now be able to open any file in gedit with easy.

Please let us know if you liked the script and if it works well for you.


How to use gedit in Ubuntu to work with files

Recommended Ubuntu book

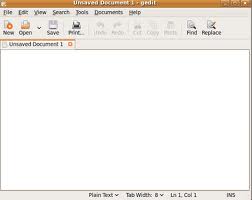
gedit Ubuntu

gedit in Ubuntu

We previously showed you the navigation using Terminal window and using commands for files and directories in Ubuntu. Now we will show you how to edit and save the files using Ubuntu GUI editor – gedit. Many people use it as a basic notepad/wordpress type editor to save the notes and such without realizing that it actually has some cool built in features.

These features include:

– syntax highlight for programming languages which include HTML, Python, Perl and many others, including non-web languages.

– fonts and colors

– spell check

– editing files from remote locations

– line numbers and character and word count

– full support for international text

– a few other useful features.

It also uses a nice plugin system which allows you to add plugins for additional functionality with a few available here. You can install the plugins as a package, type in terminal:

sudo apt-get install gedit-plugins

Now play around and see the new add-ons, such as very useful terminal window showing at the bottom panel of the editor.


How to install gedit if you need to:

gedit is usually installed by default in Ubuntu. However, if it is missing, you can install it from a terminal window using apt-get command (more on it at some point later):

sudo apt-get install gedit

Or install it using GUI Synaptic located in System > Administration > Synaptic Package Manager.


How to start gedit:

gedit can be started from GUI or Terminal. Here is how to start it from the terminal window. Open a new terminal window and type:

gedit

Pretty easy. 🙂 You can also open it from Desktop by clicking your mouse a few times. It is located at:

Applications > Accessories > Text Editor


How to open and edit the files in Terminal using gedit:

You can do it using GUI, which doesn’t need explanations – just click your mouth, but you can also use the Terminal to get some additional options. To open a file myfirstfile for example, make sure you know the path as we discussed in our Ubuntu navigation tutorial and type:

gedit myfirstfile

if the file is in the current folder. So if you are in ~/Desktop and the file is in ~/Desktop (remember “~” tilde sign is a shortcut for your home directory), it will open myfirstfile. If the file exists, it will open it to edit, if it doesn’t it will create a new file and open it to edit.

Now here is a cool feature – you can open the file and take you directly to the line number you need. So to get to line 200 when opening the file type:

gedit +200 myfirstfile

You can also open many files at once. This feature can save you some time. Just type:

gedit myfirstfile mysecondfile mythirdfile

to open all 3 files.

Also, remember that gedit will not open the system or protected files without sudo and as you may know, sudo for GUI applications is gksudo. So to open init.d for instance you would have to type:

gksudo gedit init.d

You can also add some options such as

gedit –new-window or

gedit –new-document

Which either creates a new window in the existing opened gedit window or creates a new document in the opened gedit.


How to edit the preferences:

Once you open gedit go to Edit > Preferences > Editor. Here you can specify the options you like. For instance, you can enable autosave or disable spell check by clicking the checkbox on and off.


How to enable gedit plugins:

You can get additional plugins as we mentioned at the beginning of the post. Now to enable/disable them, go to Edit > Preferences > Plugins. You can see that a few come preloaded with standard gedit, such as spell check for instance. Go through the list and check it out, you may need it helpful, especially if you write any kind of code in gedit.


This is it for now, I will publish a few more smaller how-to tutorials for gedit, such as how to “Open file with gedit” when you right click the file for instance, which is pretty handy.

How to use file and directory commands in Ubuntu and Linux

Recommended Ubuntu book

Ubuntu Terminal Window

Ubuntu Terminal Window

Now that you installed Ubuntu, learned how to navigate in Ubuntu using Terminal window, lets take a look on how to manipulate the files and directories in CLI.

1) Creating a file in Ubuntu using Terminal.

There are a few ways. The most standard way to create a file across the linux systems is touch command. So, if you are in your home folder (cd ~), type:

touch myfirstfile

and press Enter. It should have created a file called “myfirstfile in the folder. To check, just type ls and press enter, it should list the files in the folder with myfirstfile in it. Please note, you must have sufficient permissions to create the file. If your user does not have the permissions, try sudo touch myfirstfile instead.

The second way to create a file is the Ubuntu GUI way:

gedit myfirstfile or sudo gedit myfirstfile

This should open up a default Ubuntu GUI text editor window – gedit, which is a pretty cool editor and I will probably have another post on how to use it appropriately. You will probably like this way to edit the files the most if you are just starting with Ubuntu.

There are other ways:

vi and vim are the common Linux CLI text editors. If you have these installed, you can try:

vim myfirstfile or vi myfirstfile appropriately, also, may have to do sudo vim myfirstfile or sudo vi myfirstfile if needed. I personally like vi since I have been using it before I started with Ubuntu, but it is a bit complicated to start with. I may need to write another post on how to use it and list the shortcuts.

Anyways, for all we will do from now, touch or gedit will do just fine.

2) Create new directories – mkdir command (short for make directory).

Lets try creating new directory. Make sure you are in your user directory – (cd ~ or just cd) and type:

mkdir myfirstdirectory

Please note, depending on your user, you may have to type sudo before every command, so if some of the actions do not work, try sudo mrdir myfirstdirectory which will execute the command you need as a superuser.

Now type ls or ls -l and you should see the newly created directory.

3) copy the files and directories – cp command(short for copy).

cp for copy, here is how to copy a file… Make sure you are in your home directory and have created a file myfirstfile as described in step 1 of this post. Now type:

cp myfirstfile myfirstfilecopy

this would copy myfirstfile and make a copy in the same directory, calling it myfirstfilecopy.

Now make sure you have a directory created in step 2 and located in the home folder. Lets copy a file to the directory:

cp myfirstfile myfirstdirectory/myfirstfile

This would copy the file into the directory and keep the name. Obviously, there are a few ways to accomplish it, such as:

cp myfirstfile ~/myfirstdirectory/myfirstfile

cp myfirstfile /user/userfoldername/myfirstdirectory/myfirstfile where userfoldername is the name of your user.

We described a few ways of calling the same directory in a previous post – how to navigate in Ubuntu.

Now it is a bit different to copy the directory. You need to add an option -R to copy recursively, meaning including all the files in it. So create a new directory called myseconddirectory. Lets copy myfirstdirectory into myseconddirectory. Type:

cp -R ~/myfirstdirectory ~/myseconddirectory

It is close to copying regular files, just don’t forget the -R flag.

3) Move and rename files and directories – mv command (short for move). Moving the files and directories is very close to copy command. To move files try:

mv myfirstfile myfirstfilemoved

This will move “myfirstfile” file into the same folder and as you can see, it can be used for renaming the files as well. The file is now called “myfirstfilemoved”.

For the directories it is close, just use the -R flag for recursive.

mv -R myfirstdirectory myseconddirectory/myfirstdirectory

It will move “myfirstdirectory” into the “myseconddirectory” directory. So once you cd myseconddirectory, you will see your “myfirstdfirectory” inside after typing ls. 🙂

4) Delete files and directories using rm command. rm stands for remove.

To remove file just type:

rm myfirstfile

To remove the directory, once again, use -R recursive option:

rm myseconddirectory

Seems easy? Practice a bit, but be careful. This is Linux, no confirmations, as soon as you do something, it is done. Make your own files to practice with, don’t touch the ones that are already there. Eventually you will learn what the files and directories in Linux are kind of the same throughout different distributions. It is kind of like Windows – remember when you first started to find out that my computer is the place you need to go to… 🙂

Please leave us the comments if you find this post useful or have any questions or suggestions. We will be slowly moving along and making out how to posts more complicated, referencing the older posts as we go. So if you find any problems with this post, let us know as well.
How to navigate using Terminal Window in Ubuntu and Linux

Recommended Ubuntu book

new terminal in Ubuntu

new terminal window in Ubuntu

Navigation is one of the first things you need to learn in Ubuntu if you want to start going beyond clicking and go beyond user interface. I will try to explain the most important uses and options of these basic commands in simple language here, please let me know in the comments if you need any clarification or just want to leave some feedback. CLI or Command Line Interface is the most important part of the Linux. First, open a terminal window and we will start learning how to navigate from one directory (folder) to another, do various actions on file and directory structure.

Now, these commands are pretty much standard across most Linux, even Unix distributions.

1) pwd command. Once you are in the Terminal, type pwd and press Enter key- it will show you where you are right now. pwd stands for “print working directory”. So, if I am in a home directory of the user hack, it will show /home/hack

So, any time you want to know where you are located, type pwd and press Enter. Now keep in mind that it may show you location as “~” in it. “~” symbol stands for home directory, so if you are user hack, it will show you “~” as the directory instead of /home/hack as it is your home directory. pwd command has two options, but they are irrelevant for you right now. Never the less, you can experiment. For reference, they are -L and -P. So, if you type pwd -L it will show the logical path, such as symbolic link. If you type in pwd -P, it will show the physical path and will not show the symbolic link if there is one. You can also do pwd –logical or pwd –physical which are the same commands but with more typing.  As with some other commands, it also has pwd –help and pwd –version. Type those in and see what they do. –help may give you even more information.

2) cd command. Just like in Windows command prompt window, cd changes the directories. Usually new terminal window takes you directly to your home directory. Use cd command to go somewhere else. Here are some examples that you can try:

cd Desk (now hit “tab” key to see autocomplete in action. It should auto-complete your directory for you and show “cd Desktop“). If not, perhaps you are not in your home directory now. Then try cd ~/Desktop . Press Enter key for the command to execute. Remember, “~” takes you to the home directory. To get back to your home directory simply type cd or cd ~ .

To navigate to root directory, type in cd / . This is the main directory. When you type “cd /“, you can try hitting tab twice. It will show you all of the folders located in the root directory. Start typing cd /va and press tab – it will autocomplete the folder for you and show cd /var . This may be not the best part for me to show how auto-completion works, but if you learn it early it will save you a lot of time down the road. 🙂

So browse around, look at the file structure, if you get lost just go back to home (cd ~) or root directory (cd /) and start all over.

You can also use relative paths. For instance, go to your Desktop directory (cd ~/Desktop). If you want to go back to your home directory, or just one directory down to /home/hack, you can just type in “cd ..” with no quotes. two dots represent one directory down. One dot represents current directory. So, typing cd . will just keep you where you are. What would you need to do to get to /home? either cd /home or cd ../.. from /home/hack/Desktop. you can go as many directories back as you need to. cd ../../.. would take you to the root folder in this case.

Now just remember cd command – c for change, d for directory. So to Change Directory use cd.

3) ls command. ls stands for list. It is the same command as “dir” in Windows Command Prompt window. It lists the content of the current folder. To see all of files and directories of the folder you are in simply type ls and press Enter. You don’t need to navigate to other folders in order to see the files. Just type ls /var to see the contents of the folder /var. ls /.. to see the files and directories in one folder down. It does come with a lot of options. I will list some here for reference, but the one you may use the most in the future is ls -l

ls -l stands for long list, it shows more information than the regular ls command. It shows things like the file/directory owner and permissions.

ls -r lists the files and folders in reverse order.

There are many options that you probably will not use right now or at all. To see the full list type in man ls . man command stands for manual. Whenever you need any information on the command and how to use it, just refer to the documentation. Say you need more information on how to use cd command. Just type in man cd and it will show you the information.

One last thing I will not for this command is something that I use a lot and usually it doesn’t get listed in many manuals. You can list just the files of a certain filetypes such as ls *.php with show all .php files in the folder. You can also mask for names and other things, such as ls a* will show you all the files and folders starting with letter a.


This is it for navigation. Now practice, look around the folders, not too much fun but at least you know how to do so now. I will try to cover the file and directory management commands some time soon. Such as creating and deleting, copying and moving, etc.